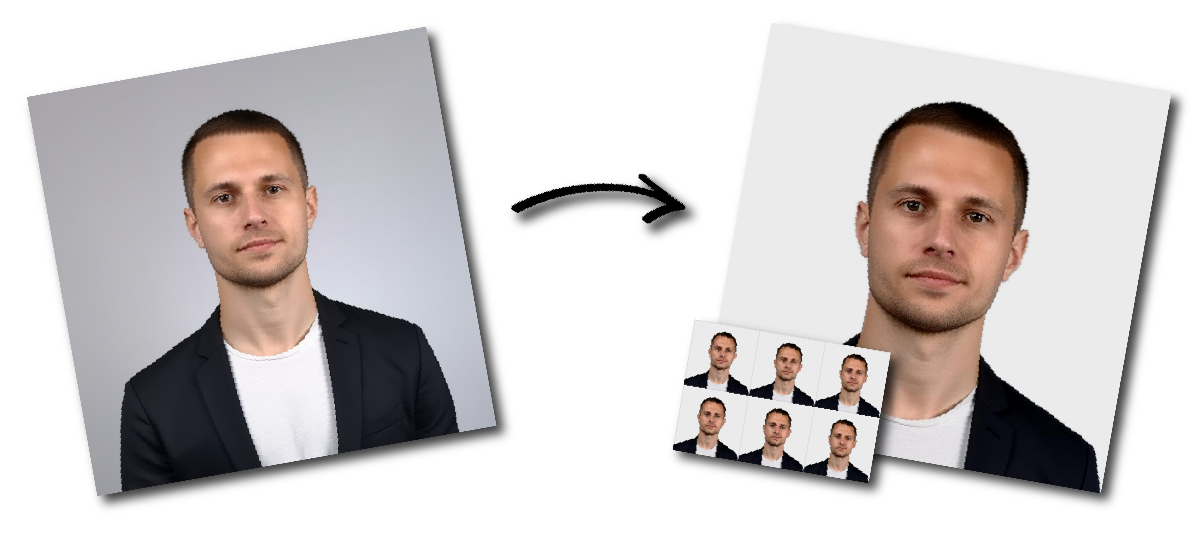

Don't worry about the size requirements. Our tool will automatically create correct Australia Visa photos for you.
Australian visa applications do not all use the same photo process. Depending on the application, you may be asked to provide a digital facial image, a printed passport-style photograph or a live biometric capture.
Always follow the instructions shown in your application, ImmiAccount document checklist, biometric request letter or correspondence from the Department of Home Affairs.
| Requirement | Guidance |
|---|---|
| Printed photo size | Usually 35–40 mm wide and 45–50 mm high |
| Face height | 32–36 mm from chin to crown |
| Photo age | Taken within the last six months |
| Colour | Full colour with natural skin tones |
| Background | Plain white, light grey or another neutral shade |
| Expression | Neutral, with eyes open and mouth closed |
| Position | Face centred and looking directly at the camera |
| Glasses | Remove unless they cannot be removed for medical reasons |
| Head coverings | Allowed for religious reasons if the full face remains visible |
| Editing | Do not retouch the face or alter identifying features |
A 35 × 45 mm photograph falls within the common passport-style size range.
When a printed passport-style photograph is requested, the usual dimensions are:
35–40 mm wide
45–50 mm high
32–36 mm from the bottom of the chin to the top of the head
PassportPhoto.online produces a 35 × 45 mm image that falls within this range.
These measurements are mainly relevant to printed photographs. Digital applications may instead specify an upload category, file format, file-size limit or other technical requirement.
Choose a clear, high-resolution image taken within the last six months. Leave enough space around your head and shoulders for cropping.
Our Australian visa photo tool will crop your image and adjust the background and lighting so that it meets the requirements.
Check the final image and download both the digital version for online submission and a printable photo template.
You don’t need professional equipment to take a suitable visa photo. A modern phone or digital camera will work, as long as the image is clear, well lit and properly framed.
Start by finding a plain, light-coloured wall — white or light grey works best. Stand roughly a metre away from it so you don’t cast a shadow behind you.
Natural light is usually the easiest option. Facing a window can give you soft, even lighting, but avoid direct sunlight or strong shadows. If you’re using indoor lighting, try to keep it balanced on both sides of your face.
Set the camera at eye level rather than above or below you. Using a tripod, timer or asking someone else to take the photo will help keep the image steady and properly aligned.
Look straight into the lens with your head upright and shoulders relaxed. Leave a bit of space around your head so the image can be cropped later if needed. It’s a good idea to take a few shots and choose the clearest one.
Avoid taking close-up selfies, as they can slightly distort your facial proportions.
A few common issues can make a photo unusable:
lighting that’s too harsh or coming from one side
shadows showing on the wall behind you
images that are blurry or low in quality
portrait mode or any artificial background blur
beauty filters or edits that change your appearance
screenshots or reused photos
images that have been compressed by messaging apps
hair covering your eyes or the sides of your face
When you take the photo, aim for a straightforward, natural look rather than trying to pose.
Stand facing the camera with your head upright and your shoulders level. Look directly into the lens, keep both eyes open and visible, and close your mouth. A relaxed, neutral expression works best—think of how you’d normally look when not reacting to anything in particular.
Make sure your whole face is clearly visible from both sides, without tilting or turning your head.
Smiling, laughing or frowning can sometimes cause issues during processing, so it’s safer to keep your expression neutral.
In most cases, it’s best to take your photo without glasses.
If you need to keep them on for medical reasons, make sure your eyes are clearly visible. The frames shouldn’t cover any part of your eyes, and there shouldn’t be glare or reflections on the lenses. Avoid tinted lenses that make it harder to see your eyes.
Religious head coverings are allowed in visa photos, provided they do not obscure your face. Your full face must be clearly visible from chin to forehead, including both sides. The covering should be plain and not distract from your facial features, and it should not cast shadows across your face.
Facial hair and simple jewellery are usually acceptable, as long as they do not cover any part of your face or cause reflections.
Keep makeup natural and avoid anything that significantly changes your appearance. This includes heavy contouring, shiny or reflective products, and any digital edits such as skin smoothing or eye enhancement.
Your photo should be a clear and accurate representation of how you currently look.
Getting a good photo of a baby can take a few attempts, so don’t worry if the first one isn’t perfect.
Lay the baby on a plain, light-coloured sheet or blanket.
Take the photo from above, keeping the camera directly over the baby.
Hold the camera straight so the face isn’t tilted.
Make sure the baby’s full face is visible and not covered by anything.
Remove toys, pillows or other objects from the frame.
Keep your hands out of the shot, even if you’re helping to keep the baby still.
Use soft, even lighting, ideally from a nearby window.
The baby should be the only person visible in the photo. For very young children, it’s generally fine if their mouth is slightly open, as long as their face can be clearly seen.
In most cases, a suitable photo should show you clearly and naturally. That usually means:
your face is centred and looking straight at the camera
your expression is neutral (no smiling or frowning)
the background is plain and light-coloured
the lighting is even, with no strong shadows
both eyes are fully visible
the image is sharp and in focus
the crop and head size look proportionate
Photos are often rejected for small issues, such as:
tilting or turning your head
poor framing or awkward cropping
your face appearing too close or too far from the camera
shadows on your face or behind you
reflections or glare on glasses
hair covering your eyes or parts of your face
blurry or low-quality images
filters or edits that change your natural appearance
Even small issues can lead to a photo being rejected. These are some of the most common problems to watch out for:
The photo may be cropped too tightly or too loosely, or it might not match the expected proportions.
If the face appears too large or too small within the frame, it may fall outside the acceptable range.
Photos that are slightly out of focus or saved through messaging apps often lose quality and may not be accepted.
Lighting that is too strong on one side can create shadows or make parts of the face harder to see clearly.
Standing too close to a wall can cause shadows behind the head or shoulders, which can affect the clarity of the image.
Using filters or editing tools to smooth skin or change facial features can make the photo unsuitable, even if the changes seem minor.
When a passport-style photograph is requested, the common printed size is 35–40 mm wide and 45–50 mm high. The face should measure 32–36 mm from chin to crown.
Follow the instructions for your specific application.
A 35 × 45 mm photograph falls within the common passport-style size range.
Yes. Use a steady camera at eye level, even lighting and a plain background. Avoid selfies, portrait effects and beauty filters.
Use a neutral expression with your mouth closed unless your application instructions state otherwise.
Glasses should normally be removed. When they cannot be removed for medical reasons, they must not hide the eyes or create glare.
A recent passport photograph may be suitable if it reflects your current appearance and meets the requirements of the visa application.
Not always. A document photograph, live facial capture and biometric collection can be separate requirements. Follow any biometric request letter or official application instructions you receive.